Showing posts with label finished. Show all posts

Thursday, March 8, 2012

Elizabethan Pin Cushion and Needlebook Finished


I finished the Pin Cushion last night but wanted to wait to take the pics till the sun was up! I am really happy with how this turned out. Since all of the hexes except the top one is lined with plastic it made for a very difficult finishing. Yes, I have a hole in my finger from pushing the needle through but I think it was worth it.There was a few moments there that I was worried that it wouldn't line up at the end. Next one like this that I make will have a different kind of plastic or interfacing or something so the sewing is a bit easier. All in all it is very pretty!
And here is the Needlebook all finished. I am not really happy with how the pages went in as they are not perfectly spaced or centered and they didn't line up on the outer edge and so I had to trim them to match BUT it is only for my use and so as long as it's functional that's really all that matters. I just have to finish the labels for the pages and sew those to the felt and then I can fill it up! Yeah! 

This is also my two finishes for this months WIPocalypse update. Unfortunately I have no clue what I want to start on next or if I want to work on anything started. I do know I am not in the mood for cross stitch today....Maybe tomorrow will be different!


Thursday, February 23, 2012

Completed Embroidery on Butterfly


Close Up of Butterfly
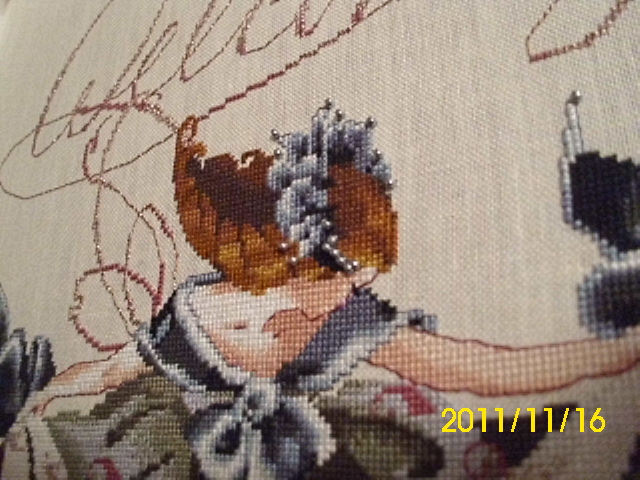
I finally finished putting on the last few beads and pailettes. She is all done and ready to be sewn into the needle book. I was debating sewing it together by hand but I think the quickness of the sewing machine is going to win out. I let my husband use a water soluble pen and do the writing on it for me. I was just too lazy to print off and transfer something and anyone who has seen my hand writing knows why I didn't do the writing myself!
Finished Embroidery

This is more of the true colors


I'm not sure what I want to work on next but I am pretty sure it will be something embroidered! 

Thursday, February 2, 2012

Paisley Owl Finished


I finished this little guy last night, his name is Paisley for obvious reasons. I used HDF Silks, Kreinik, Mill Hill Beads, and is stitched on 28ct Linen. He is stuffed with rice in his "wings" polyfil and then weighted down with rice in the bottom. He sits about 3 1/2 " high and about 3" wide.

Thursday, December 1, 2011

A La Belle Etoile Finished!

It took me about 3 weeks total to finish this up but today I just wanted it done and out of my hair and I must say I adore it! So Here it is....


Worked over one on 32ct linen ( sorry I don't know the dyer) with HDF silks, I finished up a plain ol' brown paper box with some scrap paper and trim, ribbons of course and a few tiny buttons. Everything I used I had on hand except the box...which was Suppose to be a gift for a teacher at school but ...she ain't gettin it, cuz I fell in love with it! LOL

Sunday, November 27, 2011

Christmas is coming and the Peacock has landed!

So we have a little peacock and it took me forever to find the perfect place for him to sit on the tree but I think we did it! Here is our tree for this year!


AND of course since I was off work today I finished my Savannah's Curtsy into a different kind of stand up (I LOVE IT!) It took forever to put it together but I think it was worth the three hours of pinning and un-pinning and trip to walmart for different pins and them more pinning!


Here is the update to the SAL..This is halfway through.....


And some progress made on the Indian Summer Mandela that I started forever ago!

Friday, November 18, 2011

Another Small Finish

I finished mom's freebie for this Christmas and I chose a little different color palette for mine....


Just in case anyone wants the colors I used here is the list for the conversion. ALL the numbers are Kreinik and the beads are Mill Hill.

Tree - 5982
Trunk- 5005
Words - 684
Kloster Blocks - DMC White with two stands 032 blending filament
Smyrna Crosses - 006
Beads - 60479


Here is what I have finished on the Thread Basket SAL for Part two and restitching part one as I go, I had to frog the entire house due to a mishap in measuring the fabric....no big deal since stitching over one is twice as fast for me!


It seams my last post was cut short a little ..I was having problems with blogger at the time and was just happy most of what I was saying made it to the web.

Next to the stretcher is going to be another small for a fabric box for one of my sons teachers....Not sure what to stitch but I have a pattern for a fun stocking ornament that might work. I'm not sure what to stitch since I don't know what she celebrates for the holidays!

Wednesday, November 16, 2011

Savannah's Curtsy! Finished...Finally


So only two weeks passed the amount of time I wanted to take to stitch this pattern but oh well...She is done and I can't wait to see what I end up with after I finish it into a welcome sign.....


Interestingly enough I was always under the impression that she didn't have a face showing in this design...I thought it was more of a "Sunbonnet Sue" looking design...Well, that's what I get for not looking very close because low and behold there are eyelashes down there! She is indeed bowing her head to the right and the part I thought was a bonnet is HAIR! LOL


Next on the menu is a little frogging to do ...well, ok ALOT of frogging to do ...remember a few posts ago I showed the first part to a SAL from The Thread Basket???? Well I don't understand how I managed to not calculate the correct size piece of fabric I needed and so I will be frogging the house and stitch the design over one. I love the fabric so much for this design I simply HAVE to do it on this.

Future stitching plans are always in motion at least for me but there are a few designs I need to finish before begining anything new...One is the SAL listed above and two is Villa Mirabilia. I also have several partial things sitting around that need finishing up as in Ro


Tuesday, April 27, 2010

Quilters Mojo Doll


In the New Issue of Quilters Home Magazine they issued a challenge to create your own Mojo doll. Well here is what happened and how mine came to life....

I started going through my quilting fabrics and was unable to find just one that would be perfect, I came across plenty that I thought were good but nothing truly grabbed me. Then I saw down under the quilting fabric this piece that my Mom had sent to me. It was see through but strong, basically it is shear curtain fabric. Then it dawned on me that I could use any fabric in my doll that I wanted too since it would show through the shear fabric! So I began by cutting a 1/2" strip off of EVERY quilting fabric that I own. 120. So she is stuffed completely with my quilting fabrics!

After completing the basic doll I saw that she looked like a crazy quilt! So I began with the ribbon embroidery and then the beading.... She needed a face and so I used paper clay and a push mold and she had a face. After a little painting and decoupage she was finished.

Materials used: Shear Fabric
                        Quilting Cotton
                         HDF Ribbon for the embroidery
                         Swarovsky crystals, czech beads and a few size 8/0 glass beads.
                         Paper clay
                         Paint and Hodge Podge.

The Results!

Monday, April 19, 2010

Hey! Look! Sunlight!

So after waiting all weekend for a good day for a better carrot photo, One finally arrived! It is beautiful here in Colorado today and so....Here is the Carrot Magnet again in better light.


Stitched on cream 25 count Evenweave over one with two strands DMC.

And the veiw from our new apartment! Look how pretty the Mountains are!!!!


Friday, April 16, 2010

Carrot Magnet!

After looking at this layin around for a few weeks I figured I better make it into something. Everyone Had really good ideas in what to turn it into but since the colors match my kitchen I figured a magnet would be the best use.

I used Heritage Plaid in matching colors and just stitched the front to the back through a piece of "tattered" ruffle I made by ripping off a piece of the fabric first. Used the left over "tattered" ruffle to tie a bow for the bottom. After the glue is dry on the magnet on the back I will put it up permanently!

The Picture is a little faded looking due to the over cast day we are having but I was in such a hurry to show you guys that I figured you would understand!LOL

Friday, April 2, 2010

Cricket Collections Freebie 2010 Carrot

I finished this a couple days ago and Forgot to post a picture of it till now. This was really fun to stitch, I worked it in DMC floss over one on 25ct Cream Evenweave. Using two strands of floss. I really waned the design to stand out since I was stitching it over one. Also I used a Sheep button and one Rose from Just Another Button Company. The design called for quite a few more buttons and a bunny but you work with what you have right? Well what MOM had! LOL I don't really use buttons like these often and she had these laying around so was nice enough to send them to me! I think they work well.

What should I turn this into? Plant Poke? Ornament? Fridge Magnet? Needle Book?.........Any Suggestions?

Saturday, March 27, 2010

GOS #5 contest entry

I had this stitched up this morning and just finished it into a plant ornament. I used Vicki Silks and Swarovski crystal flowers and one butterfly. I also used size 6/0 beads around the outside and hung a tassel of crystals and even a crystal heart from the bottom. Maybe it will bring good luck to my Orchid who has seen better days.

Oh and the plant hook was just made out of a wire coat hanger, the kind with the vinyl covering.

Finished Needle Tweet! Pinkie!

I just finished this cute little birdie today and took a few pictures!

Oh and i DROVE BY THIS HOUSE TODAY AND JUST HAD TO TAKE A PHOTO! this would be the perfet house but it was a little too close to the neighbors!

Tuesday, March 2, 2010

Floss Fairy FINALLY finished!

After almost four hours of beads she is finally done and can leave the stretcher. I can't say I am a big fan of Crescent colors and this linen together but The kit did come with enough fiber to finish the design. She turned out alot better then the photo shows on the kit. She has quite a bit of glitter to her which is hard to capture with the camera but I did my best since it is night here and no natural light to be found!


this last photo shows the dimension of the beads - SEE there was ALOT of them!


Saturday, February 20, 2010

My 5 hour finish!

I just finished this little ornament for my Ort's jar! I will be my entry into the GOS contest for this time around. It was very quick and fun to finish. My first time using the eyelet maker! 

Stitched on 40ct Hint of Heather by Newcastle Linen with HDF Mystery Silks. I added a little purple butterfly and some size 15/0 beads to dress it up a bit!